Beautiful Soft 'Fluffy bags!
12-09-2019
Krista
36554
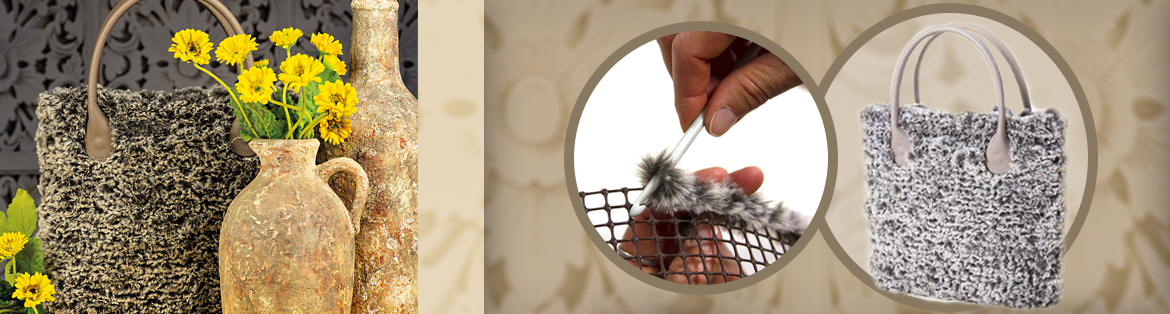
Design your own bag with our DIY bags sets.
How To:
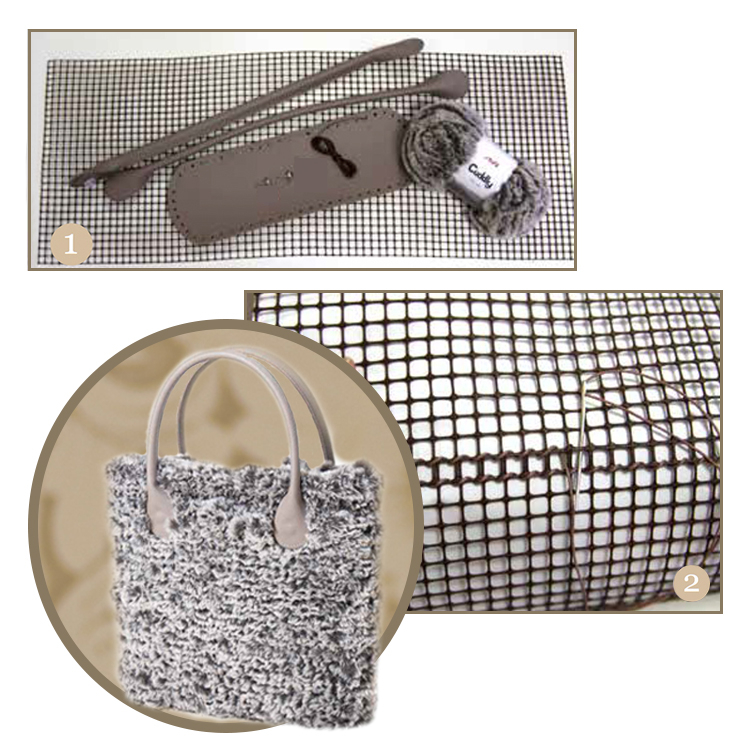
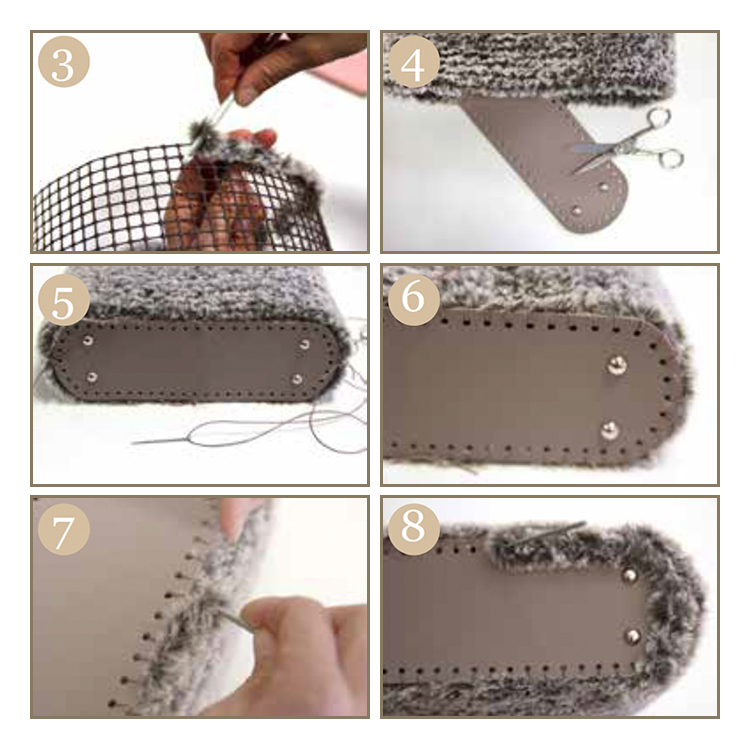
This DIY bag can be made by using the complete set. You also need a crochet hook 3.5 and 6 mm and a large wool needle.
The content of the set:
- A plastic 'net'
- Wool
- Bag bottom
- Handles
- wax cord
- Bottom buttons
- How to instruction sheet with photo’s
|
|
info@kippershobby.nl
+31(0)38 3756789
Copyright 2024, KippersHobby

